Timon Harz
June 18, 2024
Master Cornell Note-Taking with Oneboard: A Step-by-Step Guid
Organize, Review, and Retain Information Efficiently with the Cornell Note-Taking System in Oneboard
Cornell Note-Taking is a proven method for efficient learning and information retention. Designed by Walter Pauk at Cornell University, this system breaks down notes into clear sections, helping you organize thoughts, review key ideas, and enhance recall. In this blog, we'll explore how you can implement this powerful method in Oneboard to level up your note-taking game.
What is the Cornell Note-Taking System?
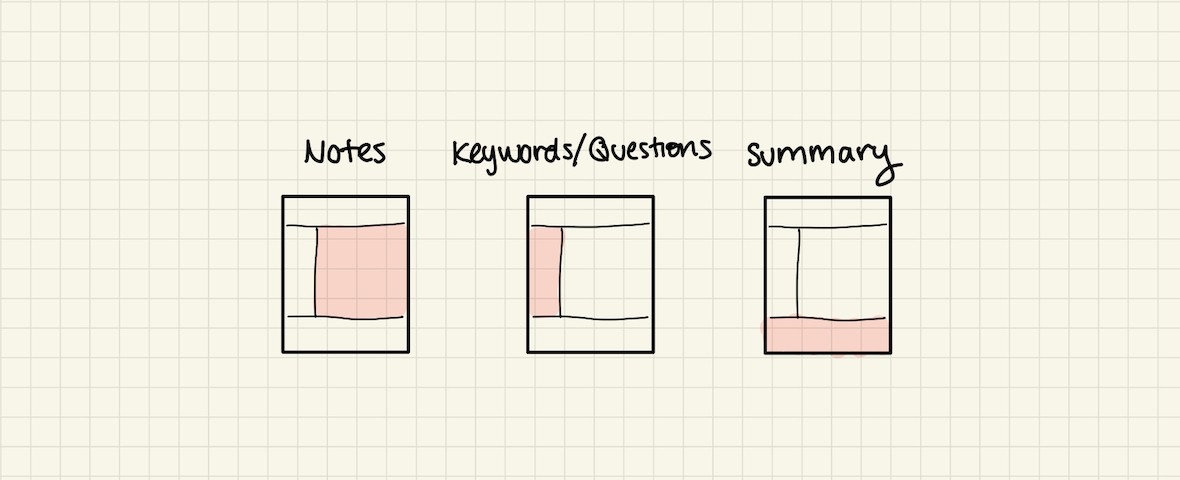
The Cornell Note-Taking System divides your note sheet into three distinct areas:
Note-taking Area (Right): Where you jot down your main notes during lectures or while reading.
Cue Column (Left): A narrow section for keywords, questions, or prompts related to your notes.
Summary Section (Bottom): A brief recap of the key ideas, making revision quicker and more effective.
With this structure, you can easily identify key information, link concepts, and review your material in a systematic way.
Why Use the Cornell Method?
Organized Structure: Helps keep your notes neat and easy to review.
Active Learning: By summarizing and creating questions, you engage with the material on a deeper level.
Quick Review: Summaries and cues streamline your study process, making it efficient to revisit crucial points.
How to Create Cornell Notes in Oneboard
Oneboard allows you to implement the Cornell method digitally, making it even more flexible and accessible. Here’s a step-by-step guide to setting up Cornell notes in Oneboard:
1. Set Up Your Page
Open Oneboard and create a new page for your notes.
In the top toolbar, select the option to divide your page into sections. You’ll want to create three distinct areas: the main notes area, a cue column, and a summary section.
2. Take Notes in the Right Section
Start by taking your notes in the main section (right side). Write down key points, explanations, diagrams, or anything else that’s important during lectures or while reading.
You can easily add NotebookCanvasTextFields to this section for typing text, or use the drawing feature if you prefer handwritten notes.
3. Add Keywords or Questions in the Cue Column
Once you’ve filled in your main notes, move to the cue column (left side). Write down keywords, questions, or topics that can serve as triggers to help recall the main points.
With Oneboard’s flexible text field system, you can add new fields in the left margin to store these cues. This makes it easier to focus on important ideas during review sessions.
4. Summarize Key Points
At the bottom of the page, create a summary of the main ideas. This helps you distill the information and focus on what’s most important.
The NotebookTextFieldTemplate feature makes it simple to create a well-organized summary section with customizable text and formatting options.
5. Use Keywords and Summary for Review
When it’s time to study, hide your main notes and use only the cue column and summary section. This helps reinforce the material by forcing you to recall it actively.
Why Cornell Notes in Oneboard?
Using the Cornell method in Oneboard offers the best of both worlds: structured note-taking combined with the flexibility and power of digital tools. Whether you’re studying for exams or organizing lecture notes, this method ensures better retention, clearer organization, and more efficient reviews.
Start Your Cornell Note-Taking Journey in Oneboard
Cornell note-taking has stood the test of time, and with Oneboard’s powerful features, it becomes even more versatile and effective. Try it out today and see how it transforms the way you capture, review, and retain information!
Press contact
Timon Harz
oneboardhq@outlook.com
Other posts


Company
About
Blog
Careers
Press
Legal
Privacy
Terms
Security